- Arabic
- French
- Russian
- Spanish
- Portuguese
- Turkish
- Armenian
- English
- Albanian
- Amharic
- Azerbaijani
- Basque
- Belarusian
- Bengali
- Bosnian
- Bulgarian
- Catalan
- Cebuano
- Corsican
- Croatian
- Czech
- Danish
- Dutch
- Afrikaans
- Esperanto
- Estonian
- Finnish
- Frisian
- Galician
- Georgian
- German
- Greek
- Gujarati
- Haitian Creole
- hausa
- hawaiian
- Hebrew
- Hindi
- Miao
- Hungarian
- Icelandic
- igbo
- Indonesian
- irish
- Italian
- Japanese
- Javanese
- Kannada
- kazakh
- Khmer
- Rwandese
- Korean
- Kurdish
- Kyrgyz
- Lao
- Latin
- Latvian
- Lithuanian
- Luxembourgish
- Macedonian
- Malgashi
- Malay
- Malayalam
- Maltese
- Maori
- Marathi
- Mongolian
- Myanmar
- Nepali
- Norwegian
- Norwegian
- Occitan
- Pashto
- Persian
- Polish
- Punjabi
- Romanian
- Samoan
- Scottish Gaelic
- Serbian
- Sesotho
- Shona
- Sindhi
- Sinhala
- Slovak
- Slovenian
- Somali
- Sundanese
- Swahili
- Swedish
- Tagalog
- Tajik
- Tamil
- Tatar
- Telugu
- Thai
- Turkmen
- Ukrainian
- Urdu
- Uighur
- Uzbek
- Vietnamese
- Welsh
- Bantu
- Yiddish
- Yoruba
- Zulu
Nov . 25, 2024 04:37 Back to list
Guide to Replacing Your V Belt Efficiently and Effectively
V-Belt Replacement A Comprehensive Guide
V-belts are vital components in many mechanical systems, transmitting power between shafts while allowing for some flexibility in alignment. Over time, these belts experience wear and can become less efficient, leading to operational problems. Regular inspection and timely replacement are essential to maintain optimal performance and prevent machinery breakdowns. This article outlines the key aspects of V-belt replacement, including signs of wear, replacement procedures, and best practices.
Signs of Wear
Identifying the need for V-belt replacement is crucial for maintaining equipment efficiency. Common signs of wear include
1. Cracks and Fraying Inspect the surface of the belt for visible cracks or frayed edges, which indicate that the belt is nearing its end of life. 2. Slipping If the belt slips during operation, it can lead to decreased power transmission and may cause overheating. 3. Squeaking Noises Unusual noises originating from the belt area can be a sign of misalignment or worn-out belts. 4. Visual Deformation A belt that appears misaligned or has stretched significantly may need replacement.
Replacement Procedure
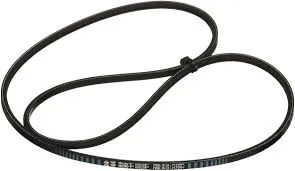
v belt replacement

When replacing a V-belt, following a systematic approach ensures a smooth process
1. Safety First Before beginning any work, ensure the machine is powered down and appropriately locked out to prevent accidental starts. 2. Remove the Old Belt Loosen or remove any tensioning devices or pulleys as necessary and carefully slide the old belt off the pulleys. Take note of the belt path for reinstallation. 3. Inspect Components Check the pulleys and tensioner for wear or damage. Clean any debris from the pulleys to ensure optimal performance of the new belt. 4. Install the New V-Belt Route the new belt along the same path as the old one, ensuring it sits properly in the pulley grooves. It’s vital to use the correct belt size and type specified by the manufacturer. 5. Adjust Tension Apply adequate tension to the belt. Most V-belts require about 1/2 inch of deflection when pressed in the middle. Proper tension ensures effective power transmission and longevity. 6. Test the System Once the belt is installed and tensioned appropriately, power on the machine and observe its operation. Listen for any unusual noises and check for proper tracking.
Best Practices
To extend the life of V-belts and reduce the frequency of replacements
- Regular Inspections Schedule periodic inspections to catch wear early and prevent failure. - Keep the Environment Clean Remove any dust and debris around the belts and pulleys, as these can contribute to wear. - Avoid Overloading Ensure that the machine is not operating beyond its designed capacity, as excessive loads can lead to premature belt failure. - Proper Alignment Ensure that pulleys are correctly aligned to prevent uneven wear.
In conclusion, understanding the signs of V-belt wear and knowing how to effectively replace them can enhance the longevity of machinery while improving operational efficiency. Regular maintenance and proactive measures will ultimately save time and costs associated with unplanned downtime.
-
Korean Auto Parts Timing Belt 24312-37500 For Hyundai/Kia
NewsMar.07,2025
-
7PK2300 90916-T2024 RIBBED BELT POLY V BELT PK BELT
NewsMar.07,2025
-
Chinese Auto Belt Factory 310-2M-22 For BMW/Mercedes-Benz
NewsMar.07,2025
-
Chinese Auto Belt Factory 310-2M-22 For BMW/Mercedes-Benz
NewsMar.07,2025
-
90916-02660 PK Belt 6PK1680 For Toyota
NewsMar.07,2025
-
drive belt serpentine belt
NewsMar.07,2025

