- Arabic
- French
- Russian
- Spanish
- Portuguese
- Turkish
- Armenian
- English
- Albanian
- Amharic
- Azerbaijani
- Basque
- Belarusian
- Bengali
- Bosnian
- Bulgarian
- Catalan
- Cebuano
- Corsican
- Croatian
- Czech
- Danish
- Dutch
- Afrikaans
- Esperanto
- Estonian
- Finnish
- Frisian
- Galician
- Georgian
- German
- Greek
- Gujarati
- Haitian Creole
- hausa
- hawaiian
- Hebrew
- Hindi
- Miao
- Hungarian
- Icelandic
- igbo
- Indonesian
- irish
- Italian
- Japanese
- Javanese
- Kannada
- kazakh
- Khmer
- Rwandese
- Korean
- Kurdish
- Kyrgyz
- Lao
- Latin
- Latvian
- Lithuanian
- Luxembourgish
- Macedonian
- Malgashi
- Malay
- Malayalam
- Maltese
- Maori
- Marathi
- Mongolian
- Myanmar
- Nepali
- Norwegian
- Norwegian
- Occitan
- Pashto
- Persian
- Polish
- Punjabi
- Romanian
- Samoan
- Scottish Gaelic
- Serbian
- Sesotho
- Shona
- Sindhi
- Sinhala
- Slovak
- Slovenian
- Somali
- Sundanese
- Swahili
- Swedish
- Tagalog
- Tajik
- Tamil
- Tatar
- Telugu
- Thai
- Turkmen
- Ukrainian
- Urdu
- Uighur
- Uzbek
- Vietnamese
- Welsh
- Bantu
- Yiddish
- Yoruba
- Zulu
Авг . 21, 2024 09:09 Back to list
Guide to Replacing Your Serpentine Belt Efficiently and Effectively
Installing a New Serpentine Belt A Step-by-Step Guide
The serpentine belt is a crucial component in modern vehicles, responsible for driving multiple peripheral devices such as the alternator, power steering pump, water pump, and air conditioning compressor. Over time, serpentine belts can wear out or become damaged, resulting in noises, loss of power assist functions, and potential engine overheating. If you’re a DIY enthusiast or simply want to save on repair costs, replacing a serpentine belt can be a manageable task if approached methodically. Here’s a step-by-step guide on how to install a new serpentine belt.
Tools and Materials Needed
Before you begin, make sure you have the right tools and materials. You will need
- A new serpentine belt (consult your vehicle’s manual or an auto parts store to ensure you have the correct belt) - A wrench set or socket set - A ratchet with the appropriate size socket (usually 3/8” for the tensioner) - A belt tensioner tool (optional, but can make the job easier) - A flashlight - Gloves (for better grip and protection)
Step 1 Prepare the Vehicle
Start by ensuring your vehicle is parked on a level surface with the engine turned off and cool to prevent burns. Open the hood and disconnect the negative battery cable to avoid any electrical shorts. This is a crucial step for your safety while working on the engine.
Step 2 Locate the Serpentine Belt
Refer to your vehicle’s manual to find the serpentine belt routing diagram, typically located on a sticker under the hood. If the diagram is missing, you can usually find one online for your specific make and model. This diagram will help you understand how the belt wraps around the pulleys.
Step 3 Release Tension from the Belt
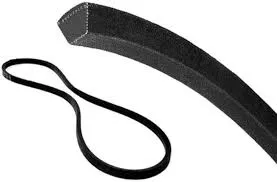
installing new serpentine belt

To remove the serpentine belt, you must release the tension from the tensioner pulley. Using a wrench or socket on the tensioner bolt, carefully rotate the tensioner away from the belt. You may need to apply significant force, depending on your vehicle. While holding the tensioner back, slide the belt off the tensioner pulley.
Step 4 Remove the Old Belt
Once the belt is free from the tensioner, you can remove it from the remaining pulleys. Take note of how the belt is routed as you remove it, as you’ll need to replicate this routing with the new belt.
Step 5 Install the New Serpentine Belt
Position the new serpentine belt according to the routing diagram. Start by looping it around the driven pulleys, leaving the tensioner pulley for last. Ensure it sits properly in the grooves of each pulley, as improper alignment can cause premature wear.
Once the belt is positioned correctly, use your wrench or tensioner tool to rotate the tensioner again. Slide the belt onto the tensioner pulley while maintaining tension. Release the tensioner slowly, ensuring the belt is properly seated.
Step 6 Final Checks
After installing the new belt, double-check that it is aligned correctly on all the pulleys and not hanging off any edges. Reconnect the negative battery cable and start the engine. Listen for any unusual noises and observe the belt in action to ensure it operates smoothly.
Conclusion
Replacing a serpentine belt is a straightforward task that can save you time and money. With the right tools and some careful preparation, you can complete this job with confidence. Regular inspections of your serpentine belt can prevent unexpected breakdowns and keep your vehicle running smoothly. Always consult your vehicle’s manual for specific instructions and safety information related to your make and model. Happy wrenching!
-
Korean Auto Parts Timing Belt 24312-37500 For Hyundai/Kia
NewsMar.07,2025
-
7PK2300 90916-T2024 RIBBED BELT POLY V BELT PK BELT
NewsMar.07,2025
-
Chinese Auto Belt Factory 310-2M-22 For BMW/Mercedes-Benz
NewsMar.07,2025
-
Chinese Auto Belt Factory 310-2M-22 For BMW/Mercedes-Benz
NewsMar.07,2025
-
90916-02660 PK Belt 6PK1680 For Toyota
NewsMar.07,2025
-
drive belt serpentine belt
NewsMar.07,2025

