- Arabic
- French
- Russian
- Spanish
- Portuguese
- Turkish
- Armenian
- English
- Albanian
- Amharic
- Azerbaijani
- Basque
- Belarusian
- Bengali
- Bosnian
- Bulgarian
- Catalan
- Cebuano
- Corsican
- Croatian
- Czech
- Danish
- Dutch
- Afrikaans
- Esperanto
- Estonian
- Finnish
- Frisian
- Galician
- Georgian
- German
- Greek
- Gujarati
- Haitian Creole
- hausa
- hawaiian
- Hebrew
- Hindi
- Miao
- Hungarian
- Icelandic
- igbo
- Indonesian
- irish
- Italian
- Japanese
- Javanese
- Kannada
- kazakh
- Khmer
- Rwandese
- Korean
- Kurdish
- Kyrgyz
- Lao
- Latin
- Latvian
- Lithuanian
- Luxembourgish
- Macedonian
- Malgashi
- Malay
- Malayalam
- Maltese
- Maori
- Marathi
- Mongolian
- Myanmar
- Nepali
- Norwegian
- Norwegian
- Occitan
- Pashto
- Persian
- Polish
- Punjabi
- Romanian
- Samoan
- Scottish Gaelic
- Serbian
- Sesotho
- Shona
- Sindhi
- Sinhala
- Slovak
- Slovenian
- Somali
- Sundanese
- Swahili
- Swedish
- Tagalog
- Tajik
- Tamil
- Tatar
- Telugu
- Thai
- Turkmen
- Ukrainian
- Urdu
- Uighur
- Uzbek
- Vietnamese
- Welsh
- Bantu
- Yiddish
- Yoruba
- Zulu
Nën . 13, 2024 01:24 Back to list
car drive belt replacement
Understanding Car Drive Belt Replacement A Comprehensive Guide
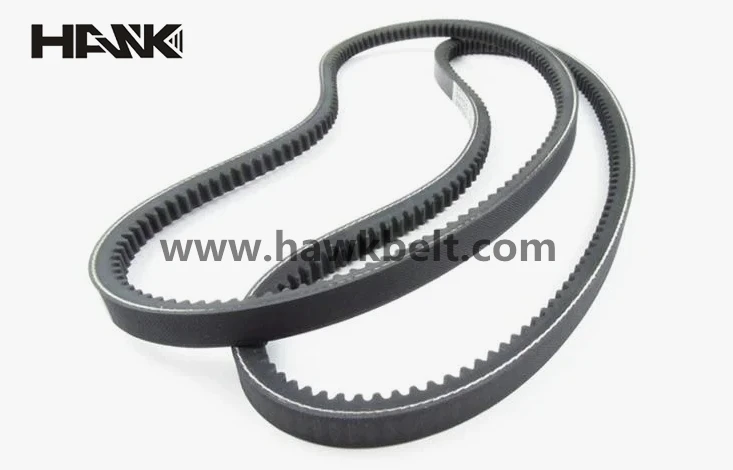
The drive belt, often overlooked in vehicle maintenance, is a crucial component that keeps your car running smoothly. This rubber belt connects various engine components, including the alternator, power steering pump, water pump, and air conditioning compressor. Over time, wear and tear can cause these belts to slip, fray, or even break, leading to a cascading failure of engine accessories and resulting in costly repairs. Understanding the significance of the drive belt and how to replace it can save you both time and money.
Importance of the Drive Belt
The drive belt plays a vital role in your vehicle's performance. It transfers power from the engine to peripheral devices, ensuring they function correctly. A failing belt can lead to a host of problems
1. Electrical Failures A worn-out belt may cause the alternator to underperform, leading to battery drainage and electrical issues. 2. Overheating A malfunctioning water pump belt can prevent proper coolant circulation, risking engine overheating.
3. Steering Difficulties If the belt that powers the power steering pump fails, driving can become notably challenging and unsafe.
Signs of a Worn Drive Belt
Recognizing the signs of a deteriorating drive belt early can mitigate larger issues down the road. Here are some indicators that it might be time to inspect or replace your drive belt
- Squeaking Noise A common symptom of a loose or worn belt. - Cracks or Frays Visual inspection may reveal signs of wear such as cracks, frayed edges, or missing chunks. - Increased Difficulty in Steering This could indicate a failing power steering pump belt. - Warning Lights Some vehicles are equipped with sensors that trigger warning lights on the dashboard when a drive belt problem is detected.
Replacing the Drive Belt
If you’re experiencing any of the above symptoms, it may be time to consider replacing your car's drive belt. Here’s a step-by-step guide on how to do it
Tools and Materials Needed
car drive belt replacement

- New drive belt - Wrench set - Screwdriver - Ratchet and socket set - Belt tensioner tool (if necessary)
Steps to Replace the Drive Belt
1. Safety First Always ensure your vehicle is parked on a flat surface with the engine off. Engage the parking brake.
2. Locate the Drive Belt Diagram Most vehicles have a belt routing diagram under the hood or in the owner’s manual. Familiarize yourself with the routing of the old belt.
3. Release Tension Using the belt tensioner tool or a wrench, relieve the tension on the belt. Rotate the tensioner counterclockwise to loosen the belt.
4. Remove the Old Belt Carefully slide the belt off the pulleys. Take note of its routing for installing the new belt.
5. Install the New Belt Following the diagram, loop the new belt around the appropriate pulleys, ensuring it sits securely in the grooves.
6. Reapply Tension Once the new belt is in place, return the tensioner to its original position to tighten the new belt.
7. Start the Engine Start your vehicle and observe the belt in motion. Ensure it runs smoothly without squeaking or wobbling.
Conclusion
Regular maintenance of your car's drive belt is essential for optimal performance and can prevent severe mechanical issues. Depending on your vehicle’s make and model, it’s advisable to replace the drive belt every 60,000 to 100,000 miles, or if any symptoms of wear appear earlier. If you are not comfortable replacing the belt yourself, don’t hesitate to consult a professional mechanic. Investing time in understanding and maintaining your drive belt can extend the life of your vehicle and enhance your driving experience. Remember a functioning drive belt means a smoother, more reliable ride!
-
Korean Auto Parts Timing Belt 24312-37500 For Hyundai/Kia
NewsMar.07,2025
-
7PK2300 90916-T2024 RIBBED BELT POLY V BELT PK BELT
NewsMar.07,2025
-
Chinese Auto Belt Factory 310-2M-22 For BMW/Mercedes-Benz
NewsMar.07,2025
-
Chinese Auto Belt Factory 310-2M-22 For BMW/Mercedes-Benz
NewsMar.07,2025
-
90916-02660 PK Belt 6PK1680 For Toyota
NewsMar.07,2025
-
drive belt serpentine belt
NewsMar.07,2025

