- Arabic
- French
- Russian
- Spanish
- Portuguese
- Turkish
- Armenian
- English
- Albanian
- Amharic
- Azerbaijani
- Basque
- Belarusian
- Bengali
- Bosnian
- Bulgarian
- Catalan
- Cebuano
- Corsican
- Croatian
- Czech
- Danish
- Dutch
- Afrikaans
- Esperanto
- Estonian
- Finnish
- Frisian
- Galician
- Georgian
- German
- Greek
- Gujarati
- Haitian Creole
- hausa
- hawaiian
- Hebrew
- Hindi
- Miao
- Hungarian
- Icelandic
- igbo
- Indonesian
- irish
- Italian
- Japanese
- Javanese
- Kannada
- kazakh
- Khmer
- Rwandese
- Korean
- Kurdish
- Kyrgyz
- Lao
- Latin
- Latvian
- Lithuanian
- Luxembourgish
- Macedonian
- Malgashi
- Malay
- Malayalam
- Maltese
- Maori
- Marathi
- Mongolian
- Myanmar
- Nepali
- Norwegian
- Norwegian
- Occitan
- Pashto
- Persian
- Polish
- Punjabi
- Romanian
- Samoan
- Scottish Gaelic
- Serbian
- Sesotho
- Shona
- Sindhi
- Sinhala
- Slovak
- Slovenian
- Somali
- Sundanese
- Swahili
- Swedish
- Tagalog
- Tajik
- Tamil
- Tatar
- Telugu
- Thai
- Turkmen
- Ukrainian
- Urdu
- Uighur
- Uzbek
- Vietnamese
- Welsh
- Bantu
- Yiddish
- Yoruba
- Zulu
Nov . 19, 2024 07:10 Back to list
Steps to Easily Replace Your Serpentine Drive Belt at Home
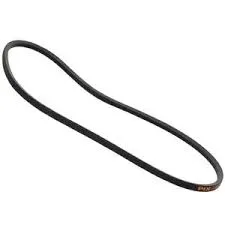
Serpentine Drive Belt Replacement A Comprehensive Guide
The serpentine drive belt is an essential component in modern vehicles, connecting multiple engine accessories to the crankshaft. This single, continuous belt drives vital components such as the alternator, power steering pump, water pump, and air conditioning compressor. Over time, the serpentine belt can wear down, crack, or become frayed, potentially leading to a breakdown of these crucial systems. Therefore, regular inspection and timely replacement of the serpentine drive belt is crucial for maintaining vehicle performance and reliability.
Signs That You Need a Replacement
Recognizing the signs of a failing serpentine belt can save you from more significant problems down the line. Watch for the following indicators
1. Squealing Noises A high-pitched squeal can indicate that the belt is slipping or worn. This sound often becomes noticeable when starting the engine or when accelerating.
2. Cracks and Fraying Inspect the belt visually. Look for cracks, fraying, or signs of wear. If you notice any significant damage, it’s time for a replacement.
3. Belt Misalignment If the belt appears to be misaligned on the pulleys, this could indicate that the tensioner or pulleys are worn out, leading to premature belt wear.
4. Reduced Accessory Performance If you notice issues like dimming headlights, difficulty steering, or a malfunctioning air conditioning system, it might be due to a failing serpentine belt.
The Replacement Process
Replacing the serpentine drive belt is a task that many DIY enthusiasts can handle, provided they have basic mechanical skills and tools. Here’s a step-by-step guide to assist you through the process
Tools Needed - Socket wrench set - Torque wrench - Serpentine belt tool or a long-handled wrench - Replacement serpentine belt (consult your vehicle’s manual for the correct part)
Steps
serpentine drive belt replacement

1. Safety First Ensure the vehicle is parked on a flat surface, the engine is turned off, and the keys are removed from the ignition. Secure the vehicle with wheel chocks and jack stands if necessary.
2. Locate the Serpentine Belt Open the hood and locate the serpentine belt. It’s usually near the front of the engine.
3. Refer to the Diagram Most vehicles have a diagram showing the proper routing of the serpentine belt. If your vehicle does not have a diagram, take a picture for reference before removal.
4. Release Tension Use a serpentine belt tool or a socket wrench to relieve tension on the belt by turning the tensioner pulley. Slip the belt off the pulleys while maintaining tension on the tool.
5. Inspect Pulley Components While the belt is off, check the condition of the pulleys and tensioner. Replace any worn components as needed.
6. Install the New Belt Following the diagram, route the new serpentine belt correctly over the pulleys. Ensure it is seated properly in each groove.
7. Apply Tension Use the belt tool to rotate the tensioner pulley again and slide the belt onto the last pulley, releasing the tension to secure the belt in place.
8. Double-Check Alignment Ensure the belt is properly aligned in all grooves and not rubbing against any components.
9. Test Start the engine and observe the belt’s operation. Listen for any unusual noises and ensure all accessories are functioning correctly.
Conclusion
Regular maintenance of your vehicle's serpentine drive belt can prevent costly repairs and ensure a smooth ride. By keeping an eye on its condition and replacing it as needed, you can avoid unexpected breakdowns. While many car owners choose to replace the serpentine belt themselves, consulting a professional can also ensure the task is done correctly. Always refer to your vehicle's manual for specific recommendations and guidelines tailored to your car model.
-
Upgrade Power Steering Pump Belt for Smooth, Quiet Operation
NewsAug.27,2025
-
Precision Timing Belt & Chain: Engine Performance & Durability
NewsAug.26,2025
-
Precision Lathe Drive Belts: Durable & Reliable Performance
NewsAug.25,2025
-
84.5 Serpentine Belt: Durable & Precision Fit for Your Engine
NewsAug.24,2025
-
Premium Ribbed Drive Belts for Quiet Power Transmission
NewsAug.23,2025
-
High-Performance Vehicle Timing Belt for Engine Precision
NewsAug.22,2025

