- Arabic
- French
- Russian
- Spanish
- Portuguese
- Turkish
- Armenian
- English
- Albanian
- Amharic
- Azerbaijani
- Basque
- Belarusian
- Bengali
- Bosnian
- Bulgarian
- Catalan
- Cebuano
- Corsican
- Croatian
- Czech
- Danish
- Dutch
- Afrikaans
- Esperanto
- Estonian
- Finnish
- Frisian
- Galician
- Georgian
- German
- Greek
- Gujarati
- Haitian Creole
- hausa
- hawaiian
- Hebrew
- Hindi
- Miao
- Hungarian
- Icelandic
- igbo
- Indonesian
- irish
- Italian
- Japanese
- Javanese
- Kannada
- kazakh
- Khmer
- Rwandese
- Korean
- Kurdish
- Kyrgyz
- Lao
- Latin
- Latvian
- Lithuanian
- Luxembourgish
- Macedonian
- Malgashi
- Malay
- Malayalam
- Maltese
- Maori
- Marathi
- Mongolian
- Myanmar
- Nepali
- Norwegian
- Norwegian
- Occitan
- Pashto
- Persian
- Polish
- Punjabi
- Romanian
- Samoan
- Scottish Gaelic
- Serbian
- Sesotho
- Shona
- Sindhi
- Sinhala
- Slovak
- Slovenian
- Somali
- Sundanese
- Swahili
- Swedish
- Tagalog
- Tajik
- Tamil
- Tatar
- Telugu
- Thai
- Turkmen
- Ukrainian
- Urdu
- Uighur
- Uzbek
- Vietnamese
- Welsh
- Bantu
- Yiddish
- Yoruba
- Zulu
12月 . 27, 2024 19:52 Back to list
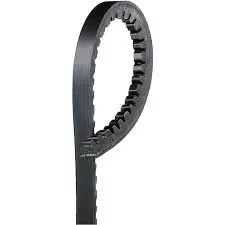
installing a serpentine belt
Installing a Serpentine Belt A Step-by-Step Guide
A serpentine belt is an essential component in modern vehicles, driving multiple peripheral devices such as the alternator, power steering pump, water pump, and air conditioning compressor. Being an integral part of the engine's operation, it is important to ensure the serpentine belt is in good condition to avoid potential engine failure and costly repairs. In this article, we’ll walk you through the steps to install a serpentine belt, providing tips and safety precautions to make the process as smooth as possible.
Tools Needed
Before you start, gather the following tools
1. Socket set (including a ratchet and various socket sizes) 2. Wrench set 3. Serpentine belt tool or a long wrench for loosening the tensioner 4. Belt routing diagram (usually located under the hood of your vehicle) 5. New serpentine belt 6. Safety gloves and goggles for protection
Step 1 Safety First
Before diving into the installation process, ensure your vehicle is parked on a level surface with the engine turned off. Engage the parking brake to prevent any movement. It’s also wise to disconnect the negative terminal of the battery to eliminate the risk of electric shock or accidental engine start-up.
Step 2 Locate the Serpentine Belt
Open the hood and locate the serpentine belt. To make the installation process easier, refer to the belt routing diagram, which will guide you through the proper configuration. If your vehicle doesn't have a diagram, you can often find one in the vehicle's owner manual or online.
Step 3 Release Tension on the Belt
To remove the old serpentine belt, you need to relieve the tension. Most vehicles are equipped with a tensioner that maintains proper tension on the belt. Using your serpentine belt tool or a wrench, rotate the tensioner counterclockwise to release the tension on the belt. You may need to apply significant force, so be prepared. Once the tension is released, carefully slide the belt off the pulleys.
Step 4 Check the Components
installing a serpentine belt

Before installing the new belt, take a moment to inspect the pulleys and other components driven by the serpentine belt. Look for any signs of wear, such as cracks or fraying on the pulleys, and ensure that everything is in good working order. If any components appear damaged, consider replacing them before installing the new belt to prevent future problems.
Step 5 Install the New Serpentine Belt
Using the belt routing diagram as a guide, position the new serpentine belt around the appropriate pulleys. Ensure the belt is seated correctly on each pulley and follows the designated path. Be careful to avoid twisting the belt, as this can lead to premature wear.
Step 6 Reapply Tension
Once the belt is properly positioned, it’s time to apply tension. Again, use your serpentine belt tool or wrench to rotate the tensioner counterclockwise. While holding the tensioner in this position, slide the belt onto the tensioner pulley, ensuring it is properly seated. Slowly release the tensioner to apply tension to the new belt.
Step 7 Double-Check the Installation
Before closing the hood, double-check your work. Ensure the belt is routed correctly and is sitting properly on all the pulleys. Rotate the belt by hand to make sure it moves smoothly without any obstructions or misalignments.
Step 8 Reconnect the Battery and Test
After confirming that everything is in place, reconnect the negative battery terminal. Start the engine and observe the belt in operation. Listen for any unusual noises which may indicate a problem, and watch for any signs of the belt slipping. If everything sounds and looks normal, you have successfully installed your new serpentine belt!
Conclusion
Installing a serpentine belt can be a straightforward task with the right tools and process. Regular maintenance, including checking the condition of your serpentine belt, can save you from more extensive repairs down the road. By following this guide, you’ll ensure your vehicle runs smoothly and efficiently, keeping you on the road without unexpected interruptions. If at any point you feel unsure, don’t hesitate to consult a professional mechanic for assistance.
-
Korean Auto Parts Timing Belt 24312-37500 For Hyundai/Kia
NewsMar.07,2025
-
7PK2300 90916-T2024 RIBBED BELT POLY V BELT PK BELT
NewsMar.07,2025
-
Chinese Auto Belt Factory 310-2M-22 For BMW/Mercedes-Benz
NewsMar.07,2025
-
Chinese Auto Belt Factory 310-2M-22 For BMW/Mercedes-Benz
NewsMar.07,2025
-
90916-02660 PK Belt 6PK1680 For Toyota
NewsMar.07,2025
-
drive belt serpentine belt
NewsMar.07,2025

