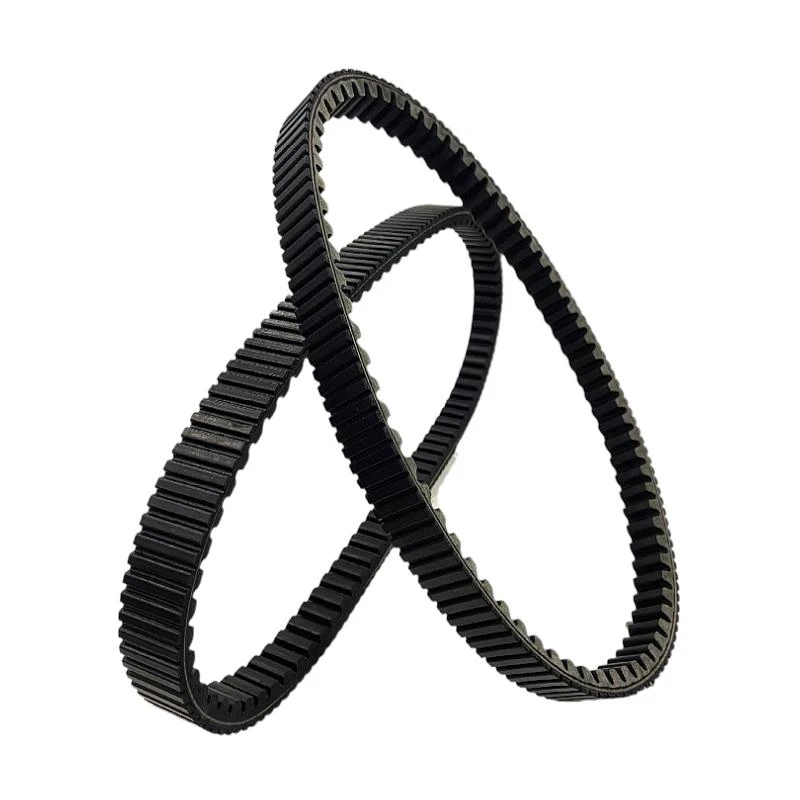
The expansion of the brake shoes is facilitated by a cam mechanism, which converts the linear motion of the brake pedal into the radial movement of the shoes. The cam rotates and pushes the shoes outward, increasing contact with the drum surface. Friction between the shoes and the drum generates the necessary braking force to slow down or stop the vehicle.
mechanical drum brake diagram7. Test Drive Once everything is in place, take the vehicle for a test drive in a safe location. Pay attention to the feel of the brakes, and make any necessary adjustments.
Drum brakes are a crucial component in vehicle braking systems, providing effective stopping power through a unique mechanism. Understanding the components of a drum brake can help one appreciate how it functions and its significance in automotive design.
さらに、ブレーキドラムのサイズも重要な要素です。大型車両や高出力の車両の場合、より大きなブレーキドラムが必要です。サイズによって冷却効率や制動力が変わるため、車両の設計に応じた最適なブレーキドラムの選定が求められます。
Installing a drum brake adapter on a Honda Ruckus requires some mechanical knowledge and skill. Here are a few considerations to keep in mind
- .
ステップ2 ホイールの取り外し
Trommelremmen zijn de traditionele remsystemen die vaak voor- of achteraan op oudere voertuigen worden aangetroffen. Ze werken door remschoenen tegen de binnenkant van een ronde trommel te duwen. Hoewel ze effectief zijn voor kleinere voertuigen of in minder veeleisende rijomstandigheden, hebben trommelremmen enkele nadelen, zoals het risico op oververhitting en een langere remweg.
まず、ブレーキドラムの交換費用は車のメーカーやモデル、地域、さらには選ぶ整備工場によって異なることがあります。一般的には、ブレーキドラムの部品代が1つあたり数千円から2万円程度、両方交換する場合はさらに高くなることがあります。つまり、部品代だけで約1万円から4万円程度が予想されます。
how much does it cost to replace brake drumsAdvantages of Disk Brakes Over Drum Brakes
A História e Importância do Tambor de Freio no Land Rover Series
- .
The traditional drum brake system has been a staple in automotive design for decades. It consists of a cylindrical drum that rotates with the wheel and brake shoes that press against the inner surface of this drum to create friction and slow down the vehicle. While effective, traditional drum brakes can exhibit limitations, particularly in terms of responsiveness and heat dissipation during heavy usage. The introduction of the Hydro E-Brake system addresses these challenges head-on.
Avant de commencer, assurez-vous d’avoir les outils et matériaux suivants
Step 3 Inspect the Brake Components
2. Nettoyage des composants
In conclusion, the drum brake self-adjuster repair kit is a vital component for anyone looking to maintain their vehicle's braking system. By ensuring that the self-adjuster functions correctly, vehicle owners can enhance their safety, improve performance, and save money on repairs in the long run. Regular maintenance and timely repairs mean a safer driving experience for everyone on the road.
Final Thoughts
One key aspect Scotty discusses is the need for regular inspections. Drum brakes can accumulate dust and debris over time, which can lead to reduced braking performance. Scotty often advises checking the condition of the brake shoes and drum surface for signs of wear or damage. If the shoes are worn down to a certain point, they need to be replaced to maintain effective braking performance.
scotty kilmer drum brakesA Importância da Mudança nos Freios a Tambor
Conversieproces
Truck Brake Drum Fire Pit Kreativní a Funkční Kousek pro Vaši Zahradu
Étape 5 Inspection des Composants
Nissan 240Z, một biểu tượng của ngành công nghiệp ô tô Nhật Bản trong những năm 1970, không chỉ nổi bật với thiết kế thanh lịch mà còn với hiệu suất vượt trội. Trong số những thành phần quan trọng góp phần vào hiệu suất này, đĩa phanh đóng vai trò không thể thiếu.
The wheel bearings play a crucial role in this system. They bear the weight of the vehicle and ensure that the wheel rotates smoothly. In many designs, wheel bearings are integrated as sealed units that require minimal maintenance. However, in some systems, the bearings can be serviced, allowing for replacement when wear occurs.
3. Gelişmiş Donanım Kiralama şirketleri genellikle en son teknolojiye sahip araçlar sunar. Bu, daha etkin ve güvenli bir işlem yapmanıza yardımcı olabilir.
brake drum removal tool rentalBromsskivor är utsatta för konstant friktion och värme varje gång bilen bromsar. När bromspedalen trycks ned pressas bromsbeläggen mot skivorna, vilket skapar det nödvändiga greppet för att sakta ner fordonet. Denna process leder till en gradvis nedbrytning av både bromsbelägg och bromsskivor. Bromsskivorna kan slitas ut av flera anledningar, inklusive överhettning, kontaminering av olja eller smuts, och ojämn förslitning.
Disc brakes also offer better performance in wet conditions, as the open design allows for water to drain away more effectively compared to the enclosed structure of drum brakes. This results in better stopping power and increased safety in adverse weather conditions.
Überlegungen zur Umrüstung
- - Rengjringsmiddel for bremser
Regular inspection and adjustment of drum brakes should be part of your vehicle's maintenance routine. Most manufacturers recommend checking brakes every 10,000 to 12,000 miles, but driving conditions can dictate more frequent checks.
1. Assess Compatibility Ensure that your vehicle’s make and model can accommodate a disc brake upgrade. Some vehicles may require significant modifications, while others may have readily available conversion kits.
كيفية عمل فرامل الأسطوانة
Regular maintenance is key to extending the life of brake drums. This includes routine inspections, cleaning, and timely replacement of worn brake shoes, as failing to do so can lead to further damage to the drums. Drivers should also follow the manufacturer's recommendations for brake maintenance and be mindful of their driving habits to mitigate excessive wear. If a brake drum shows significant wear — typically measured in terms of thickness – it should be replaced. Ignoring these signs can result in more severe braking issues and increased repair costs.
समापन करते हुए, ड्रम ब्रेक स्प्रिंग टूल न केवल एक उपकरण है, बल्कि यह आपकी कार की सुरक्षा का एक महत्वपूर्ण हिस्सा है। इसे सही तरीके से उपयोग करना और रखरखाव करना आपके वाहन के जीवनकाल को बढ़ाने में मदद करता है। इसलिए, यदि आप अपनी कार को ठीक से चलाना चाहते हैं, तो इस महत्वपूर्ण उपकरण को अपने गैरेज में अवश्य रखें।
A brake drum is a cylindrical component that plays a crucial role in drum brake systems. It is typically made from strong materials like cast iron or aluminum, allowing it to withstand high temperatures and friction. The 3600% indicates the brake drum's superior performance characteristics, suggesting it can effectively manage heat and wear, making it suitable for heavy-duty applications.
- - ,。
Pierwszym krokiem jest demontaż bębna hamulcowego z pojazdu. Upewnij się, że samochód jest na stabilnym podłożu, a przednie lub tylne koła są uniesione, w zależności od tego, które bębny chcesz zmierzyć. Odkręć koło, a następnie zdemontuj bęben hamulcowy. Uważaj, aby nie uszkodzić innych elementów układu hamulcowego podczas demontażu.
Understanding Rear Brake Drum Replacement Cost
O Que é um Medidor de Tambor de Freio?
4. Measure for Wear Use a micrometer to measure the inner diameter of the drum. Refer to the manufacturer’s specifications to determine if the drum can be machined or if it needs replacement.
The adjuster mechanism is also a significant aspect of the brake drum system. Over time, brake shoes wear down due to friction, leading to reduced braking efficiency. The adjuster compensates for this wear by automatically adjusting the position of the shoes closer to the drum, ensuring optimal performance. Many modern brake drum systems feature automatic adjusters, which require little to no maintenance. However, periodic checks are essential to ensure they operate correctly.
8. Reassemble and Test Once adjustments are complete, reassemble the wheel and lower the vehicle. Test the handbrake by engaging it while the car is in gear to ensure it holds the vehicle in place. Ideally, the handbrake should engage within a few clicks of the lever.
A rear drum brake kit typically includes all the necessary components to completely replace or refurbish the rear brake system. These components often include brake drums, shoes, springs, adjusters, and sometimes even wheel cylinders. The design of drum brakes differs significantly from disc brakes, providing unique advantages and requiring specific maintenance procedures.
Gamit ang brake spring tool, simulan ang pag-install ng bagong springs. Tiyakin na ang mga spring ay nakalagay sa tamang posisyon at ang mga dulo nito ay maayos na nakatutok sa mga brake shoes. Ang tamang pag-aayos ng mga spring ay mahalaga para sa epektibong pag-andar ng preno.
However, if you're set on enhancing the aesthetics of your drum brakes or protecting them from rust, there are a few steps you can take to do it properly. The first step is to ensure that you use high-temperature brake paint specifically designed for this purpose. Regular spray paints are not suitable, as they cannot withstand the heat generated by brake friction.
can you paint drum brakes- .
Le remplacement des plaquettes de frein à tambour est une opération cruciale pour garantir la sécurité de votre véhicule. Les freins à tambour, bien que moins courants sur les véhicules modernes, sont toujours utilisés sur de nombreux modèles, en particulier les voitures anciennes et certains véhicules utilitaires. Comprendre quand et comment remplacer ces plaquettes peut faire une grande différence en matière de performance et de sécurité.Tout d'abord, il est important de savoir quand les plaquettes de frein doivent être remplacées. Généralement, vous devriez inspecter les freins tous les 20 000 à 30 000 kilomètres ou dès que vous remarquez des signes d'usure, comme un bruit de grincement ou une diminution de l'efficacité du freinage. Un frottement anormal, une pédale de frein molle ou des vibrations lors du freinage peuvent également indiquer qu'un remplacement est nécessaire.Le processus de remplacement des plaquettes de frein à tambour peut être réalisé par soi-même, mais il nécessite quelques outils spécifiques, notamment un cric, des clés à molette, et un jeu de tournevis. Avant de commencer, assurez-vous d'avoir à portée de main des plaquettes neuves, car il est souvent conseillé de remplacer les deux côtés pour maintenir un équilibre dans le système de freinage.Commencez par lever le véhicule et retirer la roue. Une fois la roue enlevée, accédez au tambour de frein. Vous devrez probablement retirer quelques boulons pour pouvoir enlever le tambour. Inspectez l'état des plaquettes existantes et du tambour lui-même. Si le tambour est usé, il peut être nécessaire de le remplacer ou de le rectifier.Pour retirer les anciennes plaquettes, dévissez les attaches et retirez-les soigneusement. Installez les nouvelles plaquettes en veillant à respecter le bon positionnement. Remettez tout en place en vous assurant que tout est bien fixé. Terminez le processus en remettant la roue et en abaissant le véhicule.Avant de prendre la route, testez le système de freinage à basse vitesse pour vous assurer que tout fonctionne correctement. Un bon entretien des freins à tambour peut prolonger leur durée de vie et assurer votre sécurité sur la route. Si vous n'êtes pas à l'aise avec cette procédure, il est toujours recommandé de consulter un professionnel. N'oubliez pas que des freins en bon état sont essentiels pour la sécurité de tous les occupants du véhicule.
drum brake shoes replacementThe swedge cutter is typically mounted on a brake lathe, a machine specifically designed for turning brake components. As the brake drum rotates, the cutting edge of the swedge cutter comes into contact with the drum’s surface, removing material in a controlled manner. This machining process not only smooths out the surface but also brings it back to its original specifications, thus extending the life of the brake drum and ensuring consistent brake performance.
After removing the drum, carefully inspect the brake shoes, springs, and other hardware. Look for signs of wear, such as thinning brake shoes or damaged springs. If any component appears worn out or damaged, it's best to replace it as part of your rebuild.
how to rebuild drum brakes