- Arabic
- French
- Russian
- Spanish
- Portuguese
- Turkish
- Armenian
- English
- Albanian
- Amharic
- Azerbaijani
- Basque
- Belarusian
- Bengali
- Bosnian
- Bulgarian
- Catalan
- Cebuano
- Corsican
- Croatian
- Czech
- Danish
- Dutch
- Afrikaans
- Esperanto
- Estonian
- Finnish
- Frisian
- Galician
- Georgian
- German
- Greek
- Gujarati
- Haitian Creole
- hausa
- hawaiian
- Hebrew
- Hindi
- Miao
- Hungarian
- Icelandic
- igbo
- Indonesian
- irish
- Italian
- Japanese
- Javanese
- Kannada
- kazakh
- Khmer
- Rwandese
- Korean
- Kurdish
- Kyrgyz
- Lao
- Latin
- Latvian
- Lithuanian
- Luxembourgish
- Macedonian
- Malgashi
- Malay
- Malayalam
- Maltese
- Maori
- Marathi
- Mongolian
- Myanmar
- Nepali
- Norwegian
- Norwegian
- Occitan
- Pashto
- Persian
- Polish
- Punjabi
- Romanian
- Samoan
- Scottish Gaelic
- Serbian
- Sesotho
- Shona
- Sindhi
- Sinhala
- Slovak
- Slovenian
- Somali
- Sundanese
- Swahili
- Swedish
- Tagalog
- Tajik
- Tamil
- Tatar
- Telugu
- Thai
- Turkmen
- Ukrainian
- Urdu
- Uighur
- Uzbek
- Vietnamese
- Welsh
- Bantu
- Yiddish
- Yoruba
- Zulu
Samh . 29, 2024 10:08 Back to list
How to Properly Install a New Serpentine Belt on Your Vehicle
Installing a New Serpentine Belt A Step-by-Step Guide
The serpentine belt is a crucial component in modern vehicles, responsible for powering various engine accessories such as the alternator, power steering pump, water pump, and air conditioning compressor. Over time, serpentine belts can wear out, crack, or stretch, leading to reduced performance and potential engine issues. Replacing a worn serpentine belt is a task that many car owners can do themselves with the right tools and knowledge. This article will guide you through the step-by-step process of installing a new serpentine belt.
Step 1 Gather Your Tools and Materials
Before you start, it’s important to gather all the necessary tools and materials. You will need
- A new serpentine belt (ensure it's the correct size for your vehicle) - A socket set or wrench set - A belt tensioner tool or a long-handled wrench - A flashlight - A mechanic's glove (optional for hand protection)
Step 2 Locate the Serpentine Belt
To begin, you need to access the serpentine belt. Open the hood of your vehicle and locate the belt routing diagram. This diagram is usually found on a sticker near the front of the engine or in the owner’s manual. This diagram is crucial as it shows the correct orientation and path of the serpentine belt around the pulleys.
Step 3 Release Tension on the Belt
To remove the serpentine belt, you must first relieve the tension on it. Locate the belt tensioner, which is a spring-loaded pulley that keeps tension on the belt. Using a socket or wrench, rotate the tensioner away from the belt. This action will release the tension, allowing you to slide the belt off the pulleys. Be cautious when releasing the tensioner, as it can snap back quickly.
Step 4 Remove the Old Serpentine Belt
With the tension released, carefully remove the serpentine belt from the pulleys. Take note of how the belt is routed around the various accessories, as you will need to install the new belt in the same configuration. If necessary, refer to the belt routing diagram for assistance.
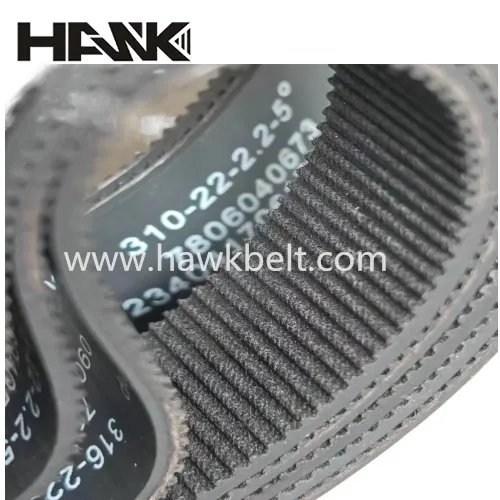
installing new serpentine belt

Step 5 Install the New Serpentine Belt
Now it’s time to install the new serpentine belt. Begin by threading the belt around the pulleys in accordance with the routing diagram. Ensure that the belt is properly seated and aligned on all pulleys. Pay particular attention to the tensioner to ensure a correct fit.
Step 6 Reapply Tension
Once the belt is in place, use your socket or wrench to rotate the tensioner again, allowing you to slip the belt over the tensioner pulley. Slowly release the tensioner, ensuring that it applies consistent tension on the new belt.
Step 7 Double-Check the Installation
Before closing the hood, take a moment to inspect your work. Make sure the belt is properly seated on all pulleys and that there are no visible twists or misalignments. A correctly installed serpentine belt should ride smoothly on the pulleys without any slippage.
Step 8 Start the Engine
Finally, start your vehicle and observe the new installation in action. Listen for any unusual noises, such as squeaking or chirping, which could indicate improper installation or a faulty component.
Conclusion
Replacing a serpentine belt is a straightforward process that can save you time and money. By following these steps, you can ensure that your vehicle maintains its performance and efficiency. If you encounter any issues during the replacement process or are unsure about any step, consult a professional mechanic for assistance. Regular maintenance and timely replacement of worn components, such as the serpentine belt, are key to keeping your vehicle running smoothly for years to come.
-
Korean Auto Parts Timing Belt 24312-37500 For Hyundai/Kia
NewsMar.07,2025
-
7PK2300 90916-T2024 RIBBED BELT POLY V BELT PK BELT
NewsMar.07,2025
-
Chinese Auto Belt Factory 310-2M-22 For BMW/Mercedes-Benz
NewsMar.07,2025
-
Chinese Auto Belt Factory 310-2M-22 For BMW/Mercedes-Benz
NewsMar.07,2025
-
90916-02660 PK Belt 6PK1680 For Toyota
NewsMar.07,2025
-
drive belt serpentine belt
NewsMar.07,2025

